Decrypting a Serial-To-WiFi device’s firmware
I’ve been doing some research into reverse engineering for a while now. I’ve also been learning about firmware and embedded systems for a long time. And I thought “Wouldn’t it be cool to combine these to skills to do something?”. So I decided to try decrypting the encrypted firmware of the a Serial-To-WiFi device. I’ve documented my process here in this blog post.
The device
I recently read that there was a vulnerability in the Moxa NPort W2150A Serial-To-Wifi device that exploit stack-based buffer overflow. I decided I would take a shot at decrypting the firmware for this device, which was encrypted by default.
I decided to find an older version of the firmware an try to crack it. After looking through the internet, I found v2.2. So I downloaded the firmware and got to decrypting.
The analysis
After reading the documentation and release note for the version 2.2 and older firmware versions, I found something interesting in the release note of version 1.11:
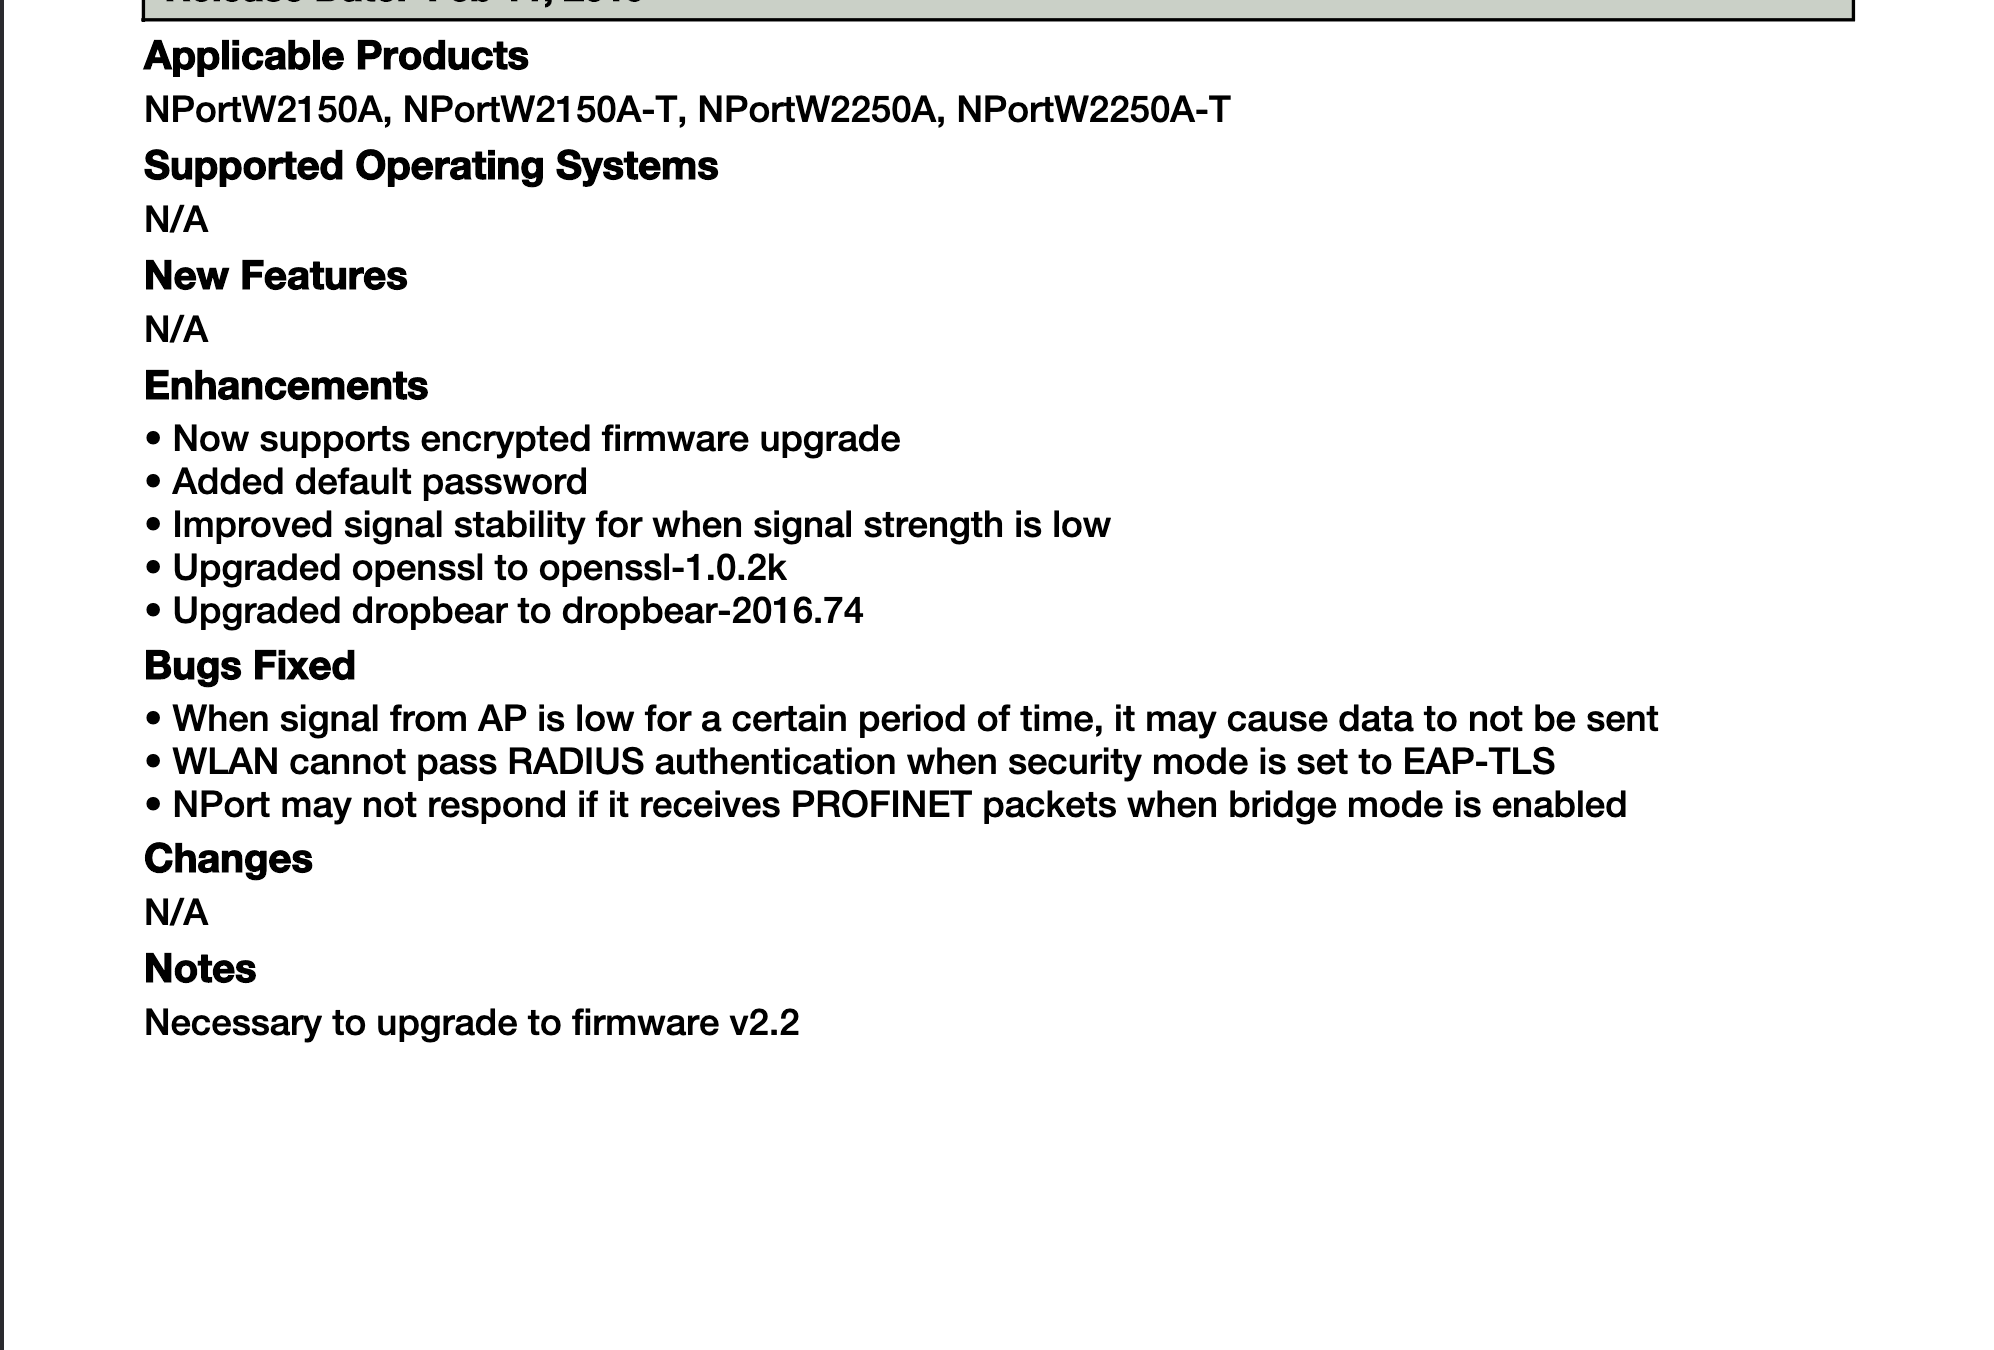
Version 1.11 is a requirement for upgrading to version 2.2. This got me wondering if the encryption for the firmware was added with the v2.2 update. So I downloaded the v1.11 release and start checking out the firmware.
I’ll try to analyze these 2 versions. I’ll use binwalk first. This tool allows me to walk through the entire binary and find file signatures and compression methods. The tool also provides extensive binary analysis features.
binwalk moxa-nport-w2150a-w2250a-series-firmware-v2.2.rom
Running this binwalk command, binwalk can only find a MySQL file, which is most likely a false positive because I don’t think a Serial-To-WiFi device would need to use a database. So we can’t really extract any information from this.
Next, I tried binwalk on this version 1.11:
binwalk moxa-nport-w2150a-w2250a-series-firmware-1.11.rom

And we can confirm that this firmware is not encrypted. There are 2 things that looks interesting here: The 2 squashfs filesystems compressed by gzip. squashfs is an entire Linux filesystem compressed.
Now that we know what is in the firmware, let’s extract it:
binwalk -e moxa-nport-w2150a-w2250a-series-firmware-1.11.rom
This command will extract the v1.11 firmware into the _moxa-nport-w2150a-w2250a-series-firmware-1.11.rom.extracted directory:
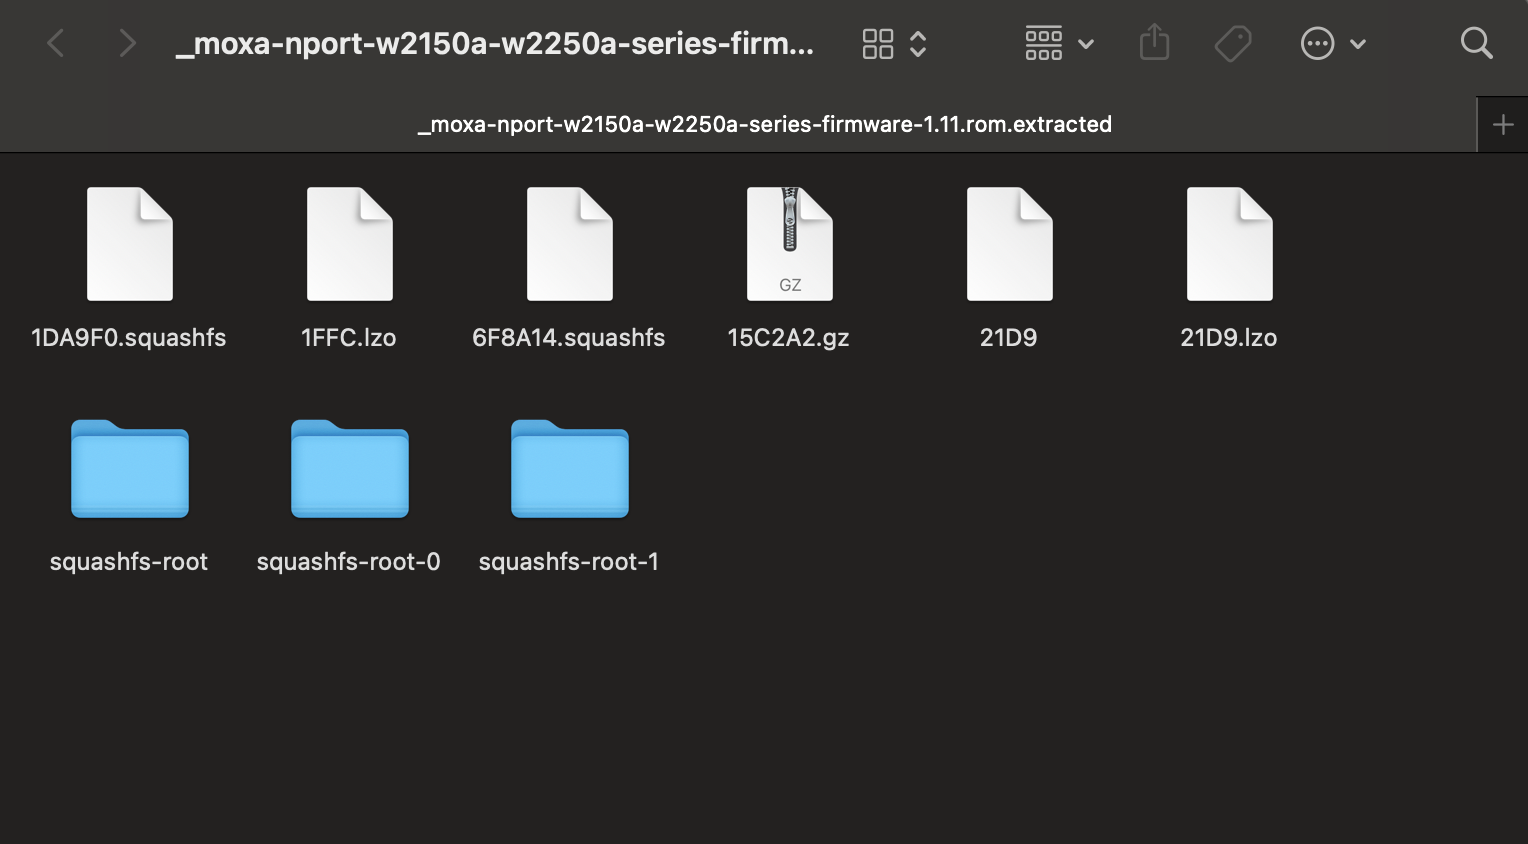
There are some squashfs-root directories, which contains the firmware’s Linux filesystem. Before we can access this, we need to give the directories correct permissions to be able to access it:
sudo chmod -R 770 squashfs-root*
Now we can access the squashfs-root directories. This looks like a UNIX filesystem:
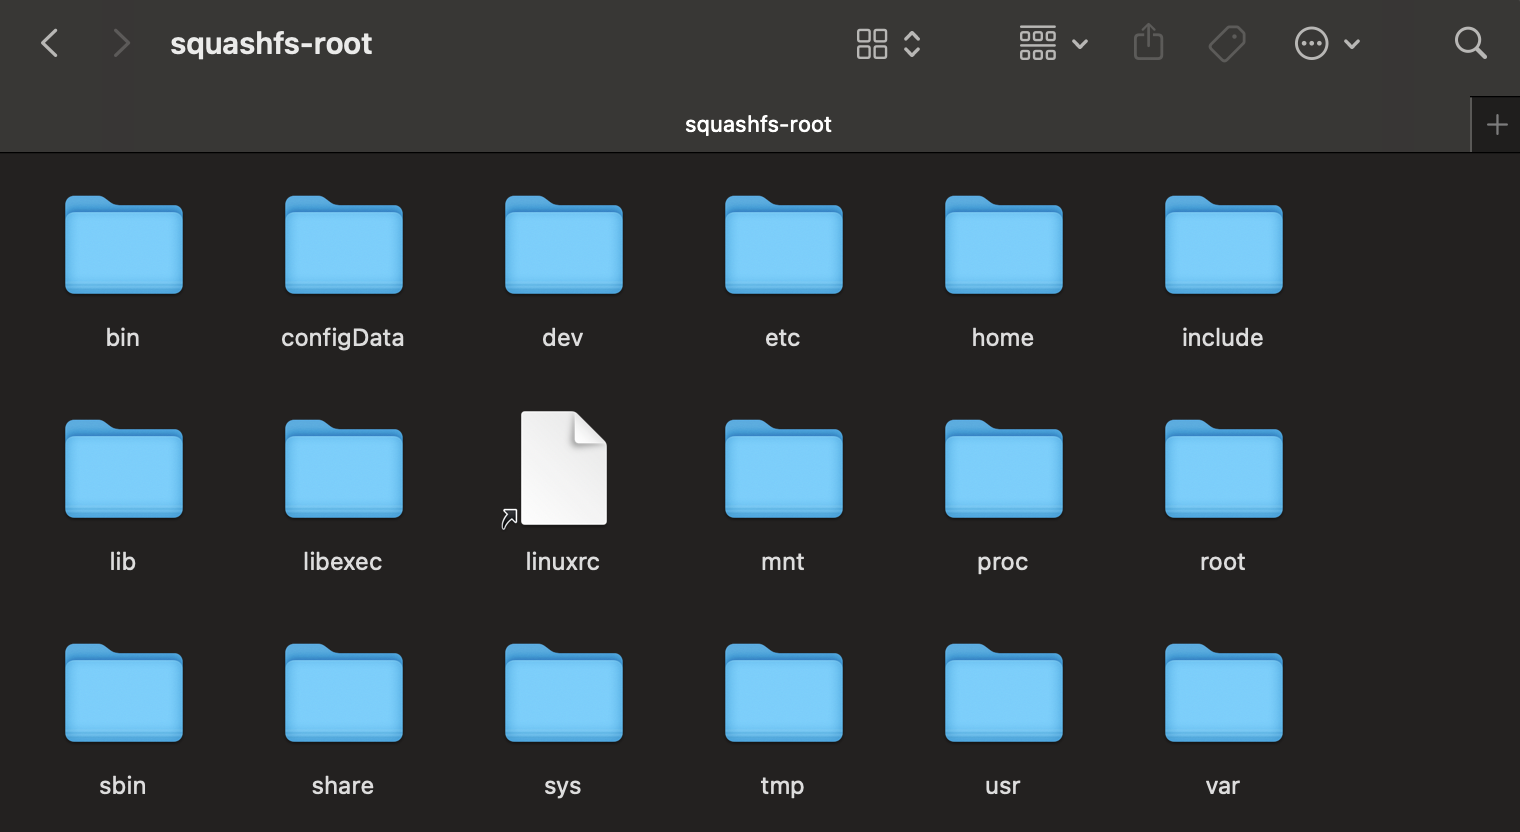
After searching through the directories, I stumbled across an interesting file in the lib directory of squashfs-root-1: libupgradeFirmware.so. Because we found out earlier that upgrading to v2.2 requires us to have v1.11, I’m guessing this libupgradeFirmware.so library will contain some information about how the firmware is encrypted. So let’s analyze this binary.
The libupgradeFirmware.so reverse engineering
I’ll use Ghidra as my decompiler of choice. It’s open source and it’s feature full.
Before we get into Ghidra, I’ll run strings on the file to check for what functions we can find in here:
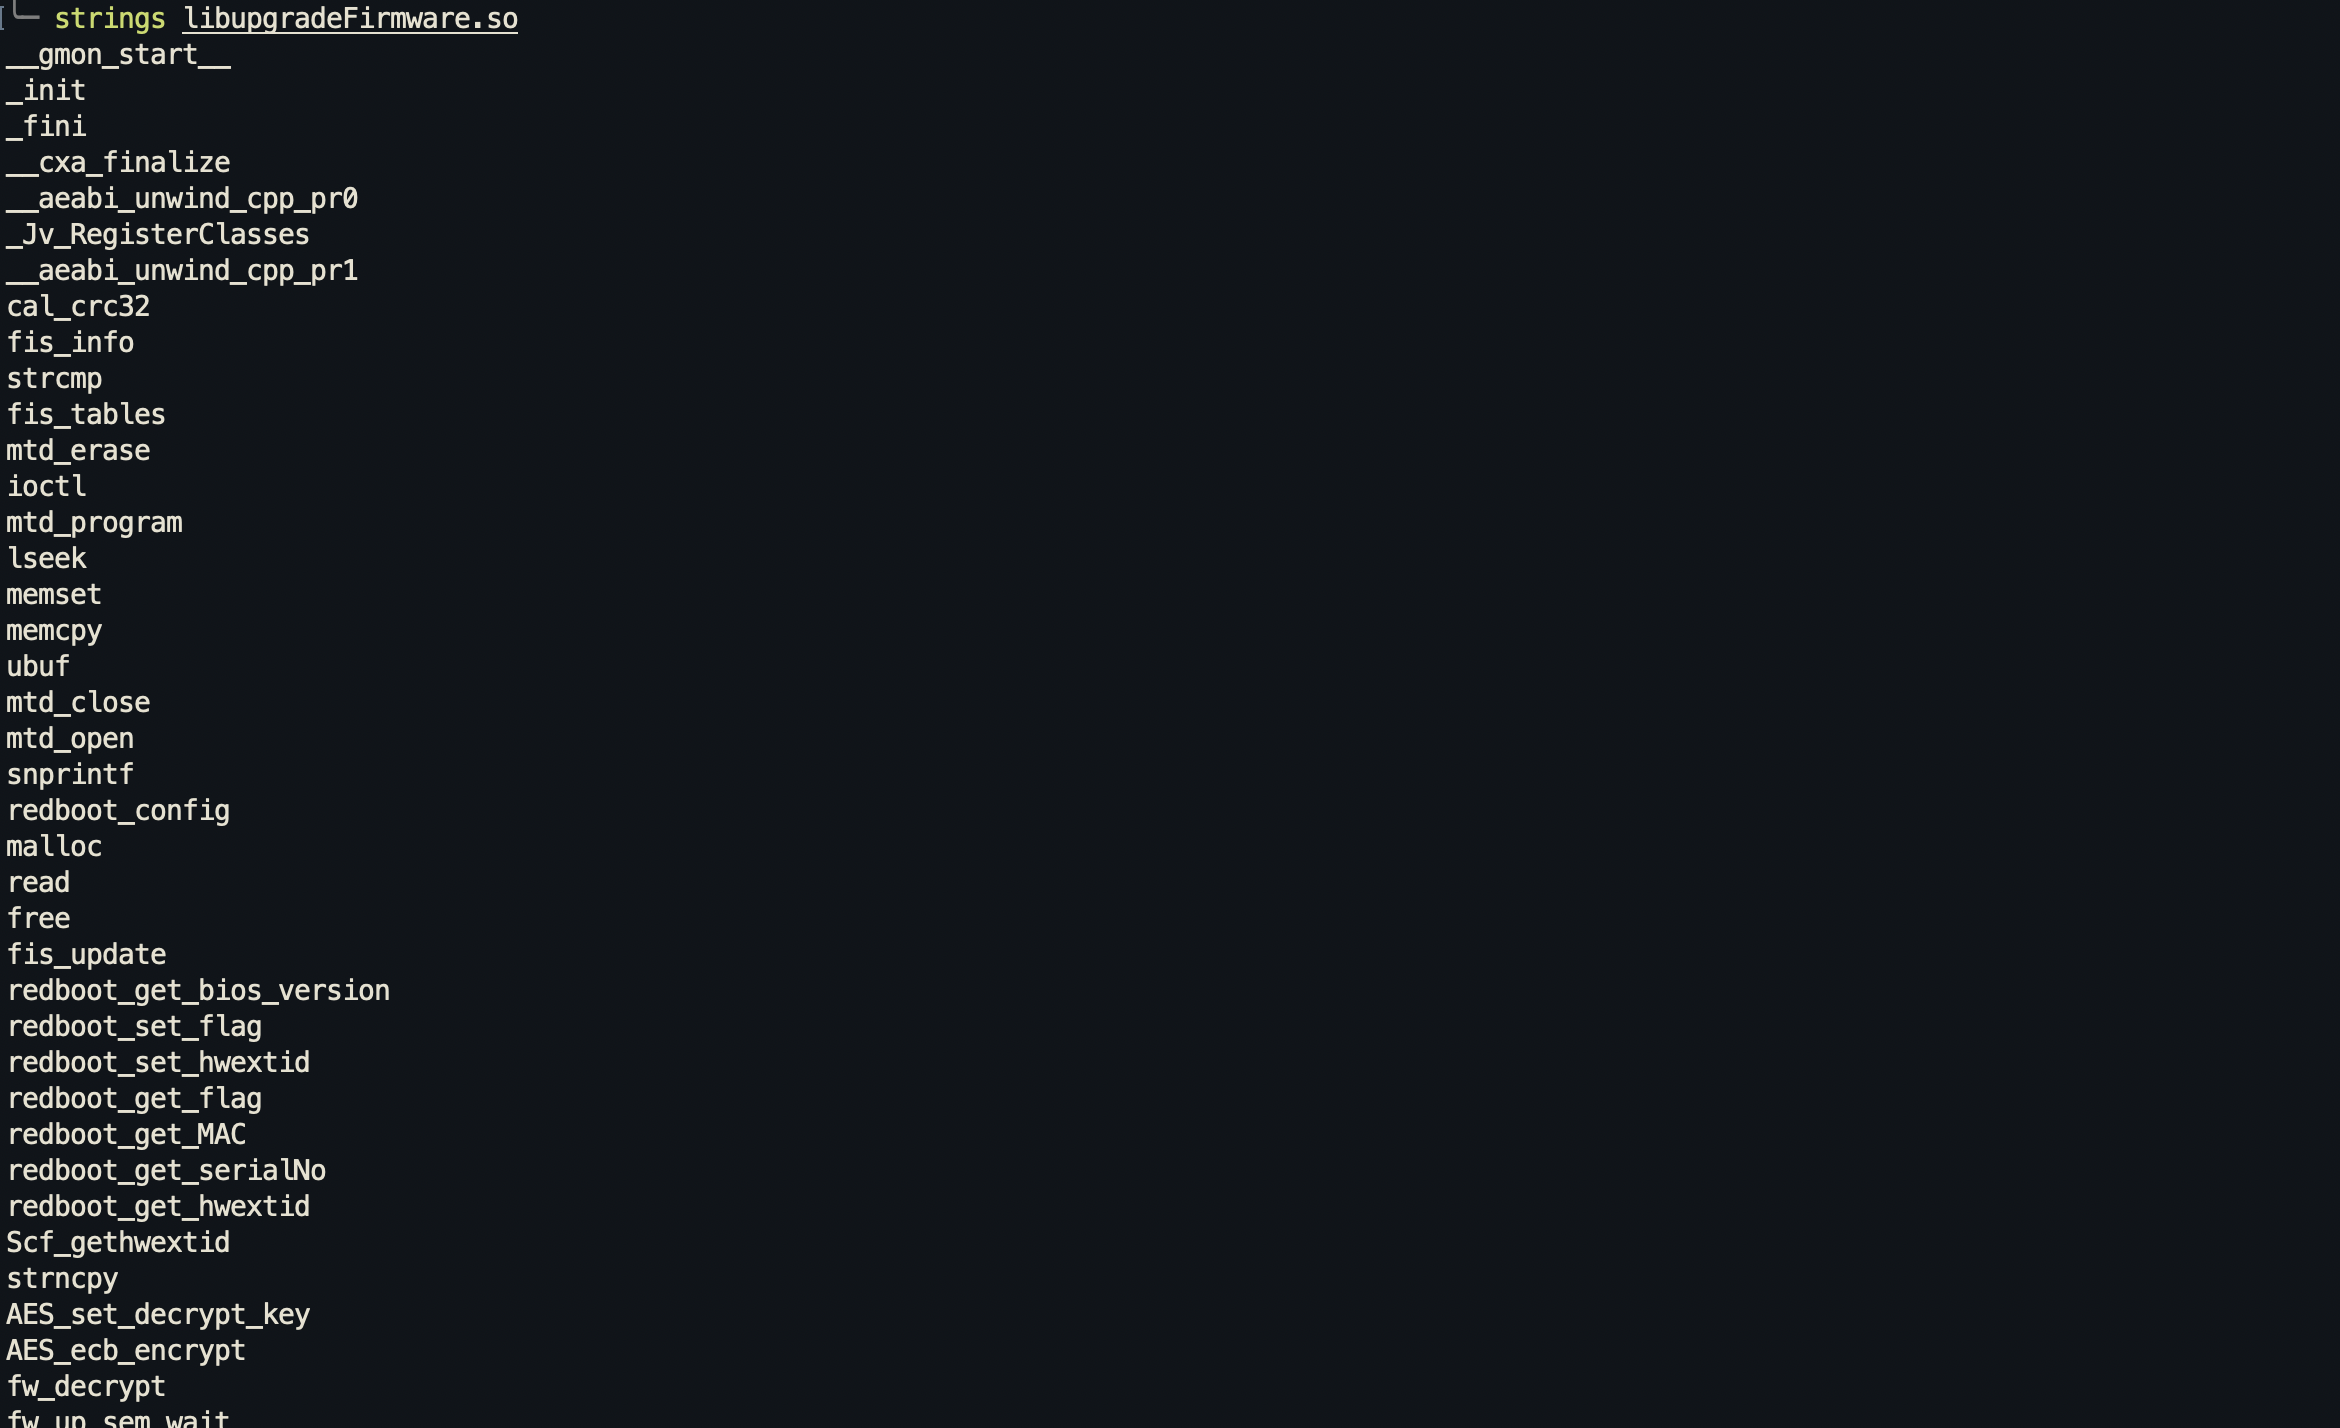
Already, we can see some interesting stuff just from that screenshot. We can see there are some AES functions, which means this binary uses AES block encryption algorithm. Let’s run grep to see what other AES functions there are:

This is using AES in ECB mode (Electronic Code Block mode). Because ECB mode generates repeating ciphertext from repeating plaintext, it is easy for someone to derive the secret key and decrypt the encryption. So this represents a huge vulnerability, which we can exploit.
I also saw from the strings output that there’s a couple of functions with the prefix fw. I’m assuming it’s a shorthand for firmware since from looking through the strings output, there’s some operations like write and decrypt. I’ll run grep on fw to see what other functions there are:
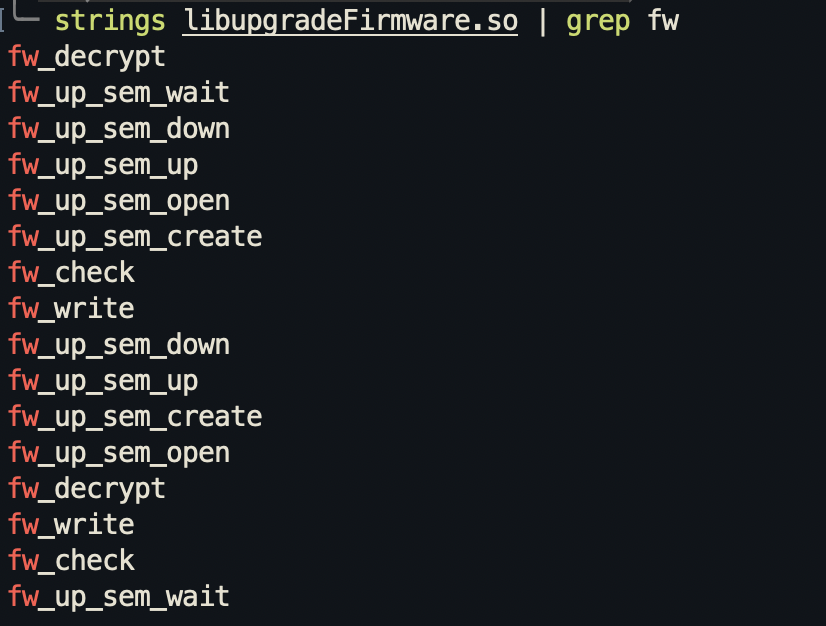
The fw_decrypt function is probably the firmware decrypt function, which means it’s quite important in this firmware.
We’ll open it up in Ghidra:
undefined8 fw_decrypt(void *param_1,uint *param_2,undefined4 param_3)
{
  undefined4 uVar1;
  uint *puVar2;
  byte *pbVar3;
  uint decrypt_size;
  uint uVar4;
  void *__src;
  uint *local_24;
  undefined4 uStack_20;

  decrypt_size = *param_2;
  if (param_1 == (void *)0x0) {
    uVar1 = 0xffffffff;
  }
  else if (*(char *)((int)param_1 + 0xe) == '\x01') {
    if ((((decrypt_size < 0x29) || (decrypt_size < (*(byte *)((int)param_1 + 0xd) + 10) * 4)) ||
        (decrypt_size < *(uint *)((int)param_1 + 8))) || ((decrypt_size - 0x28 & 0xf) != 0)) {
      uVar1 = 0xfffffffe;
    }
    else {
      pbVar3 = &passwd.3309;
      while (pbVar3 + 4 != ubuf) {
        *pbVar3 = *pbVar3 ^ 0xa7;
        pbVar3[1] = pbVar3[1] ^ 0x8b;
        pbVar3[2] = pbVar3[2] ^ 0x2d;
        pbVar3[3] = pbVar3[3] ^ 5;
        pbVar3 = pbVar3 + 4;
      }
      local_24 = param_2;
      uStack_20 = param_3;
      ecb128Decrypt((uchar *)param_1,(uchar *)param_1,decrypt_size,&passwd.3309);
      uVar4 = *(uint *)((int)param_1 + 8);
      if (((0x28 < uVar4) && ((*(byte *)((int)param_1 + 0xd) + 10) * 4 < uVar4)) &&
         (*(char *)((int)param_1 + 0xe) == '\0')) {
        __src = (void *)((int)param_1 + (uint)*(byte *)((int)param_1 + 0xd) * 4 + 0x24);
        memcpy(&local_24,__src,4);
        puVar2 = (uint *)cal_crc32((int)__src + 4,uVar4 + (*(byte *)((int)param_1 + 0xd) + 10) * -4,
                                   0);
        if (puVar2 == local_24) {
          if ((int)decrypt_size < (int)uVar4) {
            uVar1 = 0xfffffffb;
          }
          else {
            *param_2 = uVar4;
            uVar1 = 0;
          }
          goto LAB_0001191c;
        }
      }
      uVar1 = 0xfffffffc;
    }
  }
  else {
    uVar1 = 0;
  }
LAB_0001191c:
  return CONCAT44(param_1,uVar1);
}
After some digging around in the code, I found that the fw_decrypt function calls another pretty interesting function called ecb128Decrypt. This is probably the AES 128 ECB mode decrypt function. And that function was directly calling some AES functions from the OpenSSL library. So to decrypt this firmware, we can use the OpenSSL command-line command in AES mode. However, we need to obtain the key used to encrypt this firmware to decrypt it.
Reversing the ecb128Decrypt function
I’ll try to reverse engineer this to get the key. We’ll start by reversing the ecb128Decrypt function:
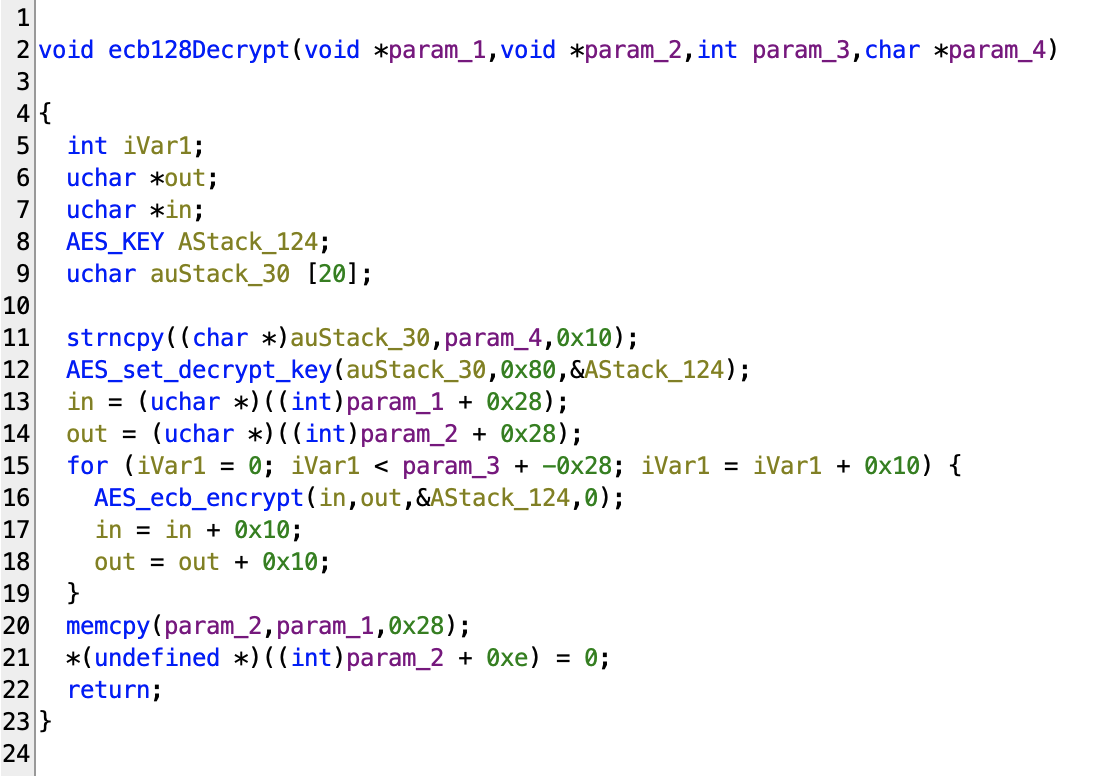
Let’s analyze this. I’ll rename and retype the variables as we analyze the program.
First, we’ll checkout the AES function. The AES_set_decrypt_key takes in a user key and expand it to an AES key. We can see that the AES_set_decrypt_key function uses auStack_30. In the OpenSSL documentation, we know that the first argument in this function is a user key. So we can rename auStack_30 to user_key. AStack_124 is the AES key so we’ll rename it to aes_key, this will be used for decryption later on.
This function also takes in a key size argument too. In our program, the key size argument is 0x80 which is 128 in decimal, so we are working with a 128-bit AES key. I’ll change the type of this 0x80 to decimal.
Next, we can see in the strncpy line, it’s copying 16 bytes of param_4 into auStack_30, which is user key. So param_4 is probably the decryption key because user_key will later be used in the AES decrypt function for decryption. We’ll rename this to decrypt_key.
We’ll take a look at the in and out variables, we can see that they contain the values of param_1 and param_2 and they are offseted by 0x10 (or 16). These 2 variables are also passed into the AES_ecb_encrypt function.
The AES_ecb_encrypt function takes in an input buffer, an output buffer, an AES key and a encrypt mode. Since the encrypt mode for the AES_ecb_encrypt function is 0 in this case, AES_ecb_encrypt will be put into decrypt mode. So this will decrypt the data in the input buffer using the AES key and output the decrypted data to the output buffer.
So we can deduct that the param_1 and param_2 variables are the input buffer and output buffer. We’ll rename param_1 to decrypt_in and param_2 to decrypt_out and retype them as uchar* because in and out are both uchar*.
Next, we can see that iVar1 is the index variable used in the loop, and it only stop when it is equal to param_3 + -0x28. So I think param_3 is the size of the input buffer. We’ll rename param_3 to decrypt_size. We can see that decrypt_size needs to be offseted by -0x28, this might be an indication that there’s some padding bytes in front of the file. If you remember back when we tried to hexdump the firmware, we found some padding 0 bytes on top of the file. So this firmware was offseted by 0x28 or 40 bytes.
Here’s the renamed and retyped function:
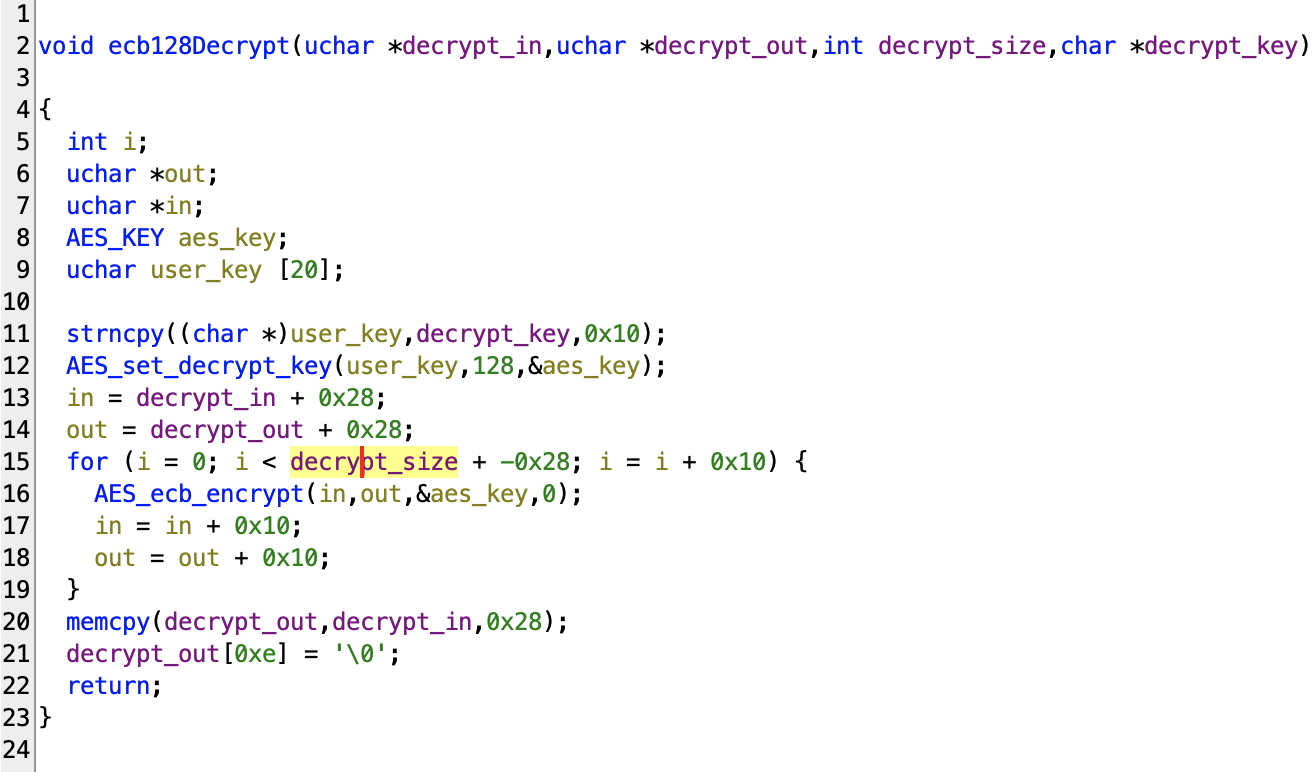
Now, we can say how ecb128Decrypt works: It takes in an encrypted input buffer (decrypt_in), decrypt it with a key (decrypt_key), and output it into an output buffer (decrypt_out).
Reversing the fw_decrypt function
Now we understand how the ecb128Decrypt function (which is the main function used in the fw_decrypt function) works, we’ll check out the fw_decrypt function and see how that works.
Note: The code for
fw_decryptis quite long so I’ll copy it into a code block here instead of taking a picture
undefined8 fw_decrypt(void *param_1,uint *param_2,undefined4 param_3)
{
  undefined4 uVar1;
  uint *puVar2;
  byte *pbVar3;
  uint decrypt_size;
  uint uVar4;
  void *__src;
  uint *local_24;
  undefined4 uStack_20;

  decrypt_size = *param_2;
  if (param_1 == (void *)0x0) {
    uVar1 = 0xffffffff;
  }
  else if (*(char *)((int)param_1 + 0xe) == '\x01') {
    if ((((decrypt_size < 0x29) || (decrypt_size < (*(byte *)((int)param_1 + 0xd) + 10) * 4)) ||
        (decrypt_size < *(uint *)((int)param_1 + 8))) || ((decrypt_size - 0x28 & 0xf) != 0)) {
      uVar1 = 0xfffffffe;
    }
    else {
      pbVar3 = &passwd.3309;
      while (pbVar3 + 4 != ubuf) {
        *pbVar3 = *pbVar3 ^ 0xa7;
        pbVar3[1] = pbVar3[1] ^ 0x8b;
        pbVar3[2] = pbVar3[2] ^ 0x2d;
        pbVar3[3] = pbVar3[3] ^ 5;
        pbVar3 = pbVar3 + 4;
      }
      local_24 = param_2;
      uStack_20 = param_3;
      ecb128Decrypt((uchar *)param_1,(uchar *)param_1,decrypt_size,&passwd.3309);
      uVar4 = *(uint *)((int)param_1 + 8);
      if (((0x28 < uVar4) && ((*(byte *)((int)param_1 + 0xd) + 10) * 4 < uVar4)) &&
         (*(char *)((int)param_1 + 0xe) == '\0')) {
        __src = (void *)((int)param_1 + (uint)*(byte *)((int)param_1 + 0xd) * 4 + 0x24);
        memcpy(&local_24,__src,4);
        puVar2 = (uint *)cal_crc32((int)__src + 4,uVar4 + (*(byte *)((int)param_1 + 0xd) + 10) * -4,
                                   0);
        if (puVar2 == local_24) {
          if ((int)decrypt_size < (int)uVar4) {
            uVar1 = 0xfffffffb;
          }
          else {
            *param_2 = uVar4;
            uVar1 = 0;
          }
          goto LAB_0001191c;
        }
      }
      uVar1 = 0xfffffffc;
    }
  }
  else {
    uVar1 = 0;
  }
LAB_0001191c:
  return CONCAT44(param_1,uVar1);
}
Let’s analyze each parts. On this line:
ecb128Decrypt((uchar *)param_1,(uchar *)param_1,decrypt_size,&passwd.3309);
Since we know how ecb128Decrypt works, we can see that the parameters decrypt_in and decrypt_out takes in the same variable: param_1. So it looks like the variable is being decrypted into the same place. We’ll rename param_1 to fw_buffer and retype it to uchar*.
The ecb128Decrypt also takes in a variable called decrypt_size, which got its value from param_2 (see line decrypt_size = *param_2;). So we can rename param_2 to fw_buffer_size.
ecb128Decrypt(fw_buffer,fw_buffer,decrypt_size,&passwd.3309);
Next, the first conditional “if” statement checks whether param_1 (fw_buffer) is null or not. If it is, it sets the uVar2 to 0xffffffff. We know that uVar2 is the return value of this fw_decrypt function so we’ll rename this to return_value.
By trying to set the return_value to 0xffffffff, it’s trying to overflow the return_value into the negative range. We can check what negative number this will overflow into by changing the data type of return_value from uint to int:
if (fw_buffer == (uchar *)0x0) {
    return_value = -1;
}
So this will just return -1, which means failed in C, if the fw_buffer is null. By figuring out what uVar2 is, we can also derive the return type of this fw_decrypt function, which is int.
int fw_decrypt(uchar *fw_buffer,uint *fw_buffer_size,undefined4 param_3)
We’re getting close, the function is much easier to read now.
In the if statement inside the else if statement, it’s checking for errors and valid firmware size and return a negative value if it’s not successful, nothing interesting yet. The else statement after that looks quite interesting though:
else {
  pbVar3 = &passwd.3309;
  while (pbVar3 + 4 != ubuf) {
    *pbVar3 = *pbVar3 ^ 0xa7;
    pbVar3[1] = pbVar3[1] ^ 0x8b;
    pbVar3[2] = pbVar3[2] ^ 0x2d;
    pbVar3[3] = pbVar3[3] ^ 5;
    pbVar3 = pbVar3 + 4;
  }
  local_24 = fw_buffer_size;
  uStack_20 = param_3;
  ecb128Decrypt(fw_buffer,fw_buffer,decrypt_size,&passwd.3309);
  uVar4 = *(uint *)(fw_buffer + 8);
  if (((0x28 < uVar4) && (bVar1 = fw_buffer[0xd], (bVar1 + 10) * 4 < uVar4)) &&
     (fw_buffer[0xe] == '\0')) {
    memcpy(&local_24,fw_buffer + (uint)bVar1 * 4 + 0x24,4);
    puVar2 = (uint *)cal_crc32((int)(fw_buffer + (uint)bVar1 * 4 + 0x24 + 4),
                               uVar4 + (fw_buffer[0xd] + 10) * -4,0);
    if (puVar2 == local_24) {
      if ((int)uVar4 <= (int)decrypt_size) {
        *fw_buffer_size = uVar4;
        return 0;
      }
      return -5;
    }
  }
  return_value = -4;
}
Let’s go through each part here:
pbVar3 = &passwd.3309;
passwd.3309 looks like a password variable. We know that this was also passed into ecb128Decrypt as the decrypt_key. We’re gonna keep a close eye on this. We can see that pbVar3 will hold the value of passwd.3309 so we’ll rename pbVar3 to password.
Next, in the while loop, we can see some XOR operations being done on the password:
while (pbVar3 + 4 != ubuf) {
  *pbVar3 = *pbVar3 ^ 0xa7;
  pbVar3[1] = pbVar3[1] ^ 0x8b;
  pbVar3[2] = pbVar3[2] ^ 0x2d;
  pbVar3[3] = pbVar3[3] ^ 5;
  pbVar3 = pbVar3 + 4;
}
This could be an indication of an obfuscation or encryption scheme. We’ll take a closer look at this by trying to reimplement the operation in a Python script.
Firstly, we need to get the hex data that passwd.3309 is pointing to, we can do this by looking at the Bytes window in Ghidra:
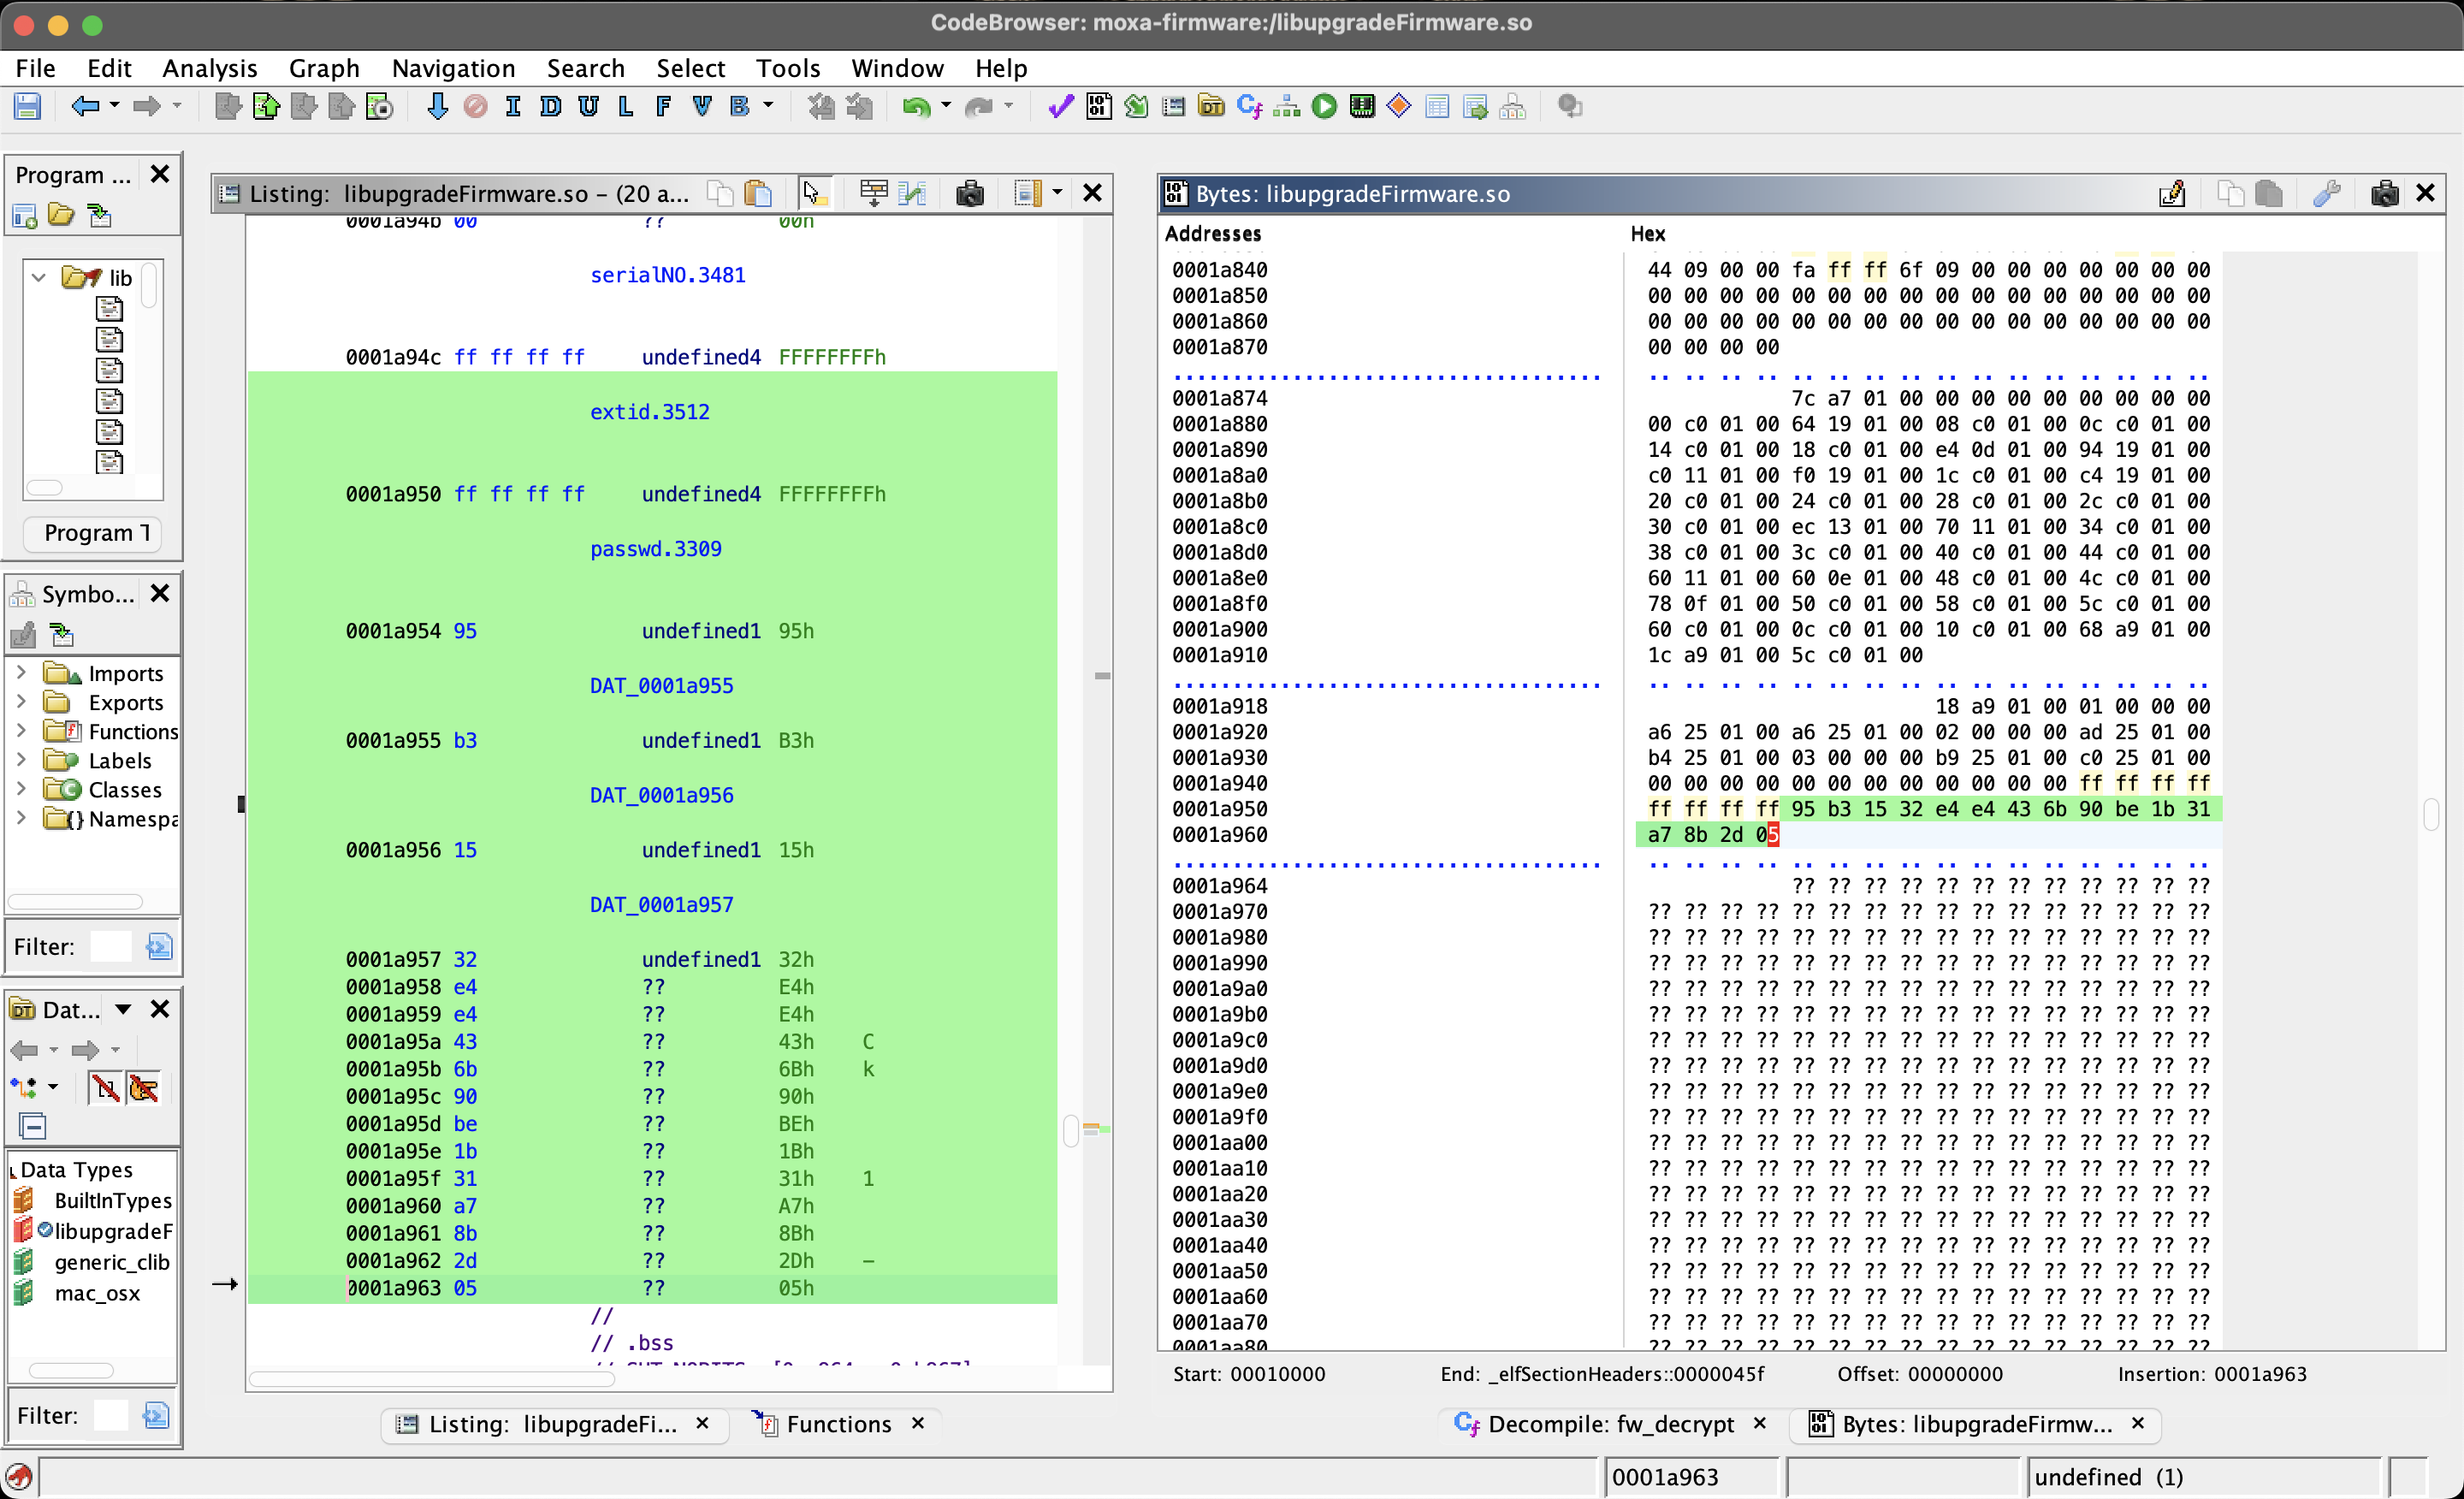
We’ll copy all those highlighted bytes into a Python array:
passwd = [0x95, 0xb3, 0x15, 0x32, 0xe4, 0xe4, 0x43, 0x6b, 0x90, 0xbe, 0x1b, 0x31, 0xa7, 0x8b, 0x2d, 0x05]
Next, we need to implement a while loop that can do all the XOR operations of the decompiled while loop:
i = 0
while (i < len(passwd)):
	passwd[i] ^= 0xa7
	passwd[i + 1] ^= 0x8b
	passwd[i + 2] ^= 0x2d
	passwd[i + 3] ^= 5

	i += 4
Once this loop is done, we can print out the password:
print("".join(chr(byte) for byte in passwd))
And that’s done, we now have the completed script:
passwd = [0x95, 0xb3, 0x15, 0x32, 0xe4, 0xe4, 0x43, 0x6b, 0x90, 0xbe, 0x1b, 0x31, 0xa7, 0x8b, 0x2d, 0x05]

i = 0
while (i < len(passwd)):
	passwd[i] ^= 0xa7
	passwd[i + 1] ^= 0x8b
	passwd[i + 2] ^= 0x2d
	passwd[i + 3] ^= 5

	i += 4

print("".join(chr(byte) for byte in passwd))
If we run this, we get this as an output:

So that means the password or the AES decrypt key of this program is “2887Conn7564”. We can now use this to decrypt the encrypted file. We need to convert this into hexadecimal first before we can use it:
print("".join(hex(byte)[2:] for byte in passwd))
This Python line will give us this hex value: 32383837436f6e6e373536340000.
The decryption
Now that we have the key, how do we decrypt this firmware?
We can use OpenSSL to decrypt this. The openssl command-line tool does support AES 128-bit ECB mode so let’s use that.
Before we can start decrypting, remember that back when we were reverse engineering the ecb128Decrypt function and doing the hexdump, we found out the exact amount of padding bytes this encrypted firmware has: 0x28 in hex or 40 in decimal.
So in order to decrypt the data, we need to remove the padding bytes first or it will also decrypt the padding bytes. I’ll use dd:
$ dd if=moxa-nport-w2150a-w2250a-series-firmware-v2.2.rom of=firmware-offseted.encrypted bs=1 skip=40
8874768+0 records in
8874768+0 records out
8874768 bytes transferred in 54.281718 secs (163495 bytes/sec)
Note:
bsmeans block size,skipmeans bytes to skip
Now we can use openssl to decrypt the new firmware-offseted.encrypted file by running it in decrypt mode and giving it our AES decrypt key:
openssl aes-128-ecb -d -K "32383837436f6e6e373536340000" -in firmware-offseted.encrypted -out firmware.decrypted
This will output a firmware.decrypted file. Now if we run binwalk on this decrypted file:

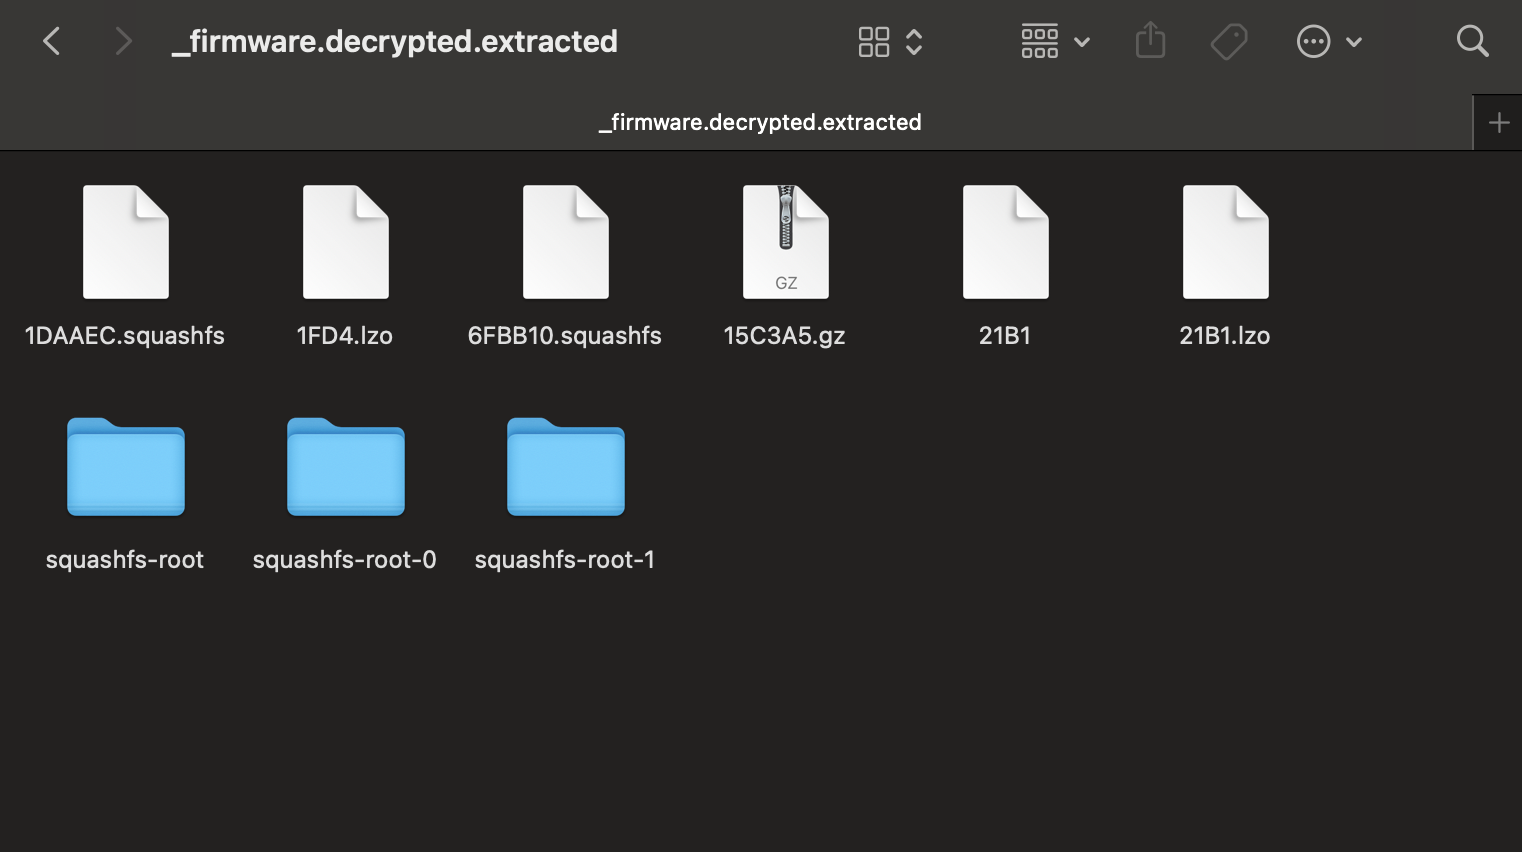
Now we can actually extract the files into _firmware.decrypted.extracted:
binwalk -e firmware.decrypted
cd _firmware.decrypted.extracted
Remember to give the squashfs-root directories execution permission:
chmod +x -R squashfs-root*
Now we have full access to the firmware:
The conclusion
That was how to reverse engineer and decrypt an encrypted firmware. We learned a fair about how to analyze a firmware for vulnerabilities and exploit those vulnerabilities.