Lập trình hệ điều hành: Boot sector [Phần 1]
In the last post, we finished installing and setting up our tools for developing an operating system. This post will start the development of our OS’s boot sector.
The BIOS
The BIOS is a program that the computer uses to start the computer system after it is powered on. It is the program responsible for loading and setting up the hardware and system in a computer and loading up the operating system.
We’re not going to be building a BIOS because that is way out of the scope of this project. What we are going to be building is another very important program that the BIOS uses when it loads up the operating system from memory: the boot sector.
What is a boot sector?
The BIOS can do many things, but 1 thing that it can’t do is loading up the operating system from memory. So then how is the operating system loaded from memory? It is loaded up through another program called the boot sector.
Since the boot sector will be used everytime the computer starts up, it needs to be placed at a fixed, standard location. This location is the first sector in the hard disk of the computer. This program will also have to take up 512 bytes as the BIOS will try to check for the bytes 0xAA and 0x55 in the 511 byte and 512 byte of the boot sector. These 2 bytes are the signature “magic numbers” that tells the BIOS that it should treat this program as the boot sector.
Note: Because we’re building an x86 OS. we need to remember that x86 is little-endian so the most significant byte will go first, then the least significant byte. You can find more information about endianess here
The simplest boot sector in the world
So with this knowledge, we can make this, which is the simplest boot sector that you can make:
jmp $

times 510-($-$$) db 0
dw 0xaa55
Let’s break this down:
- The first part of the code is just an jump to the current address location. This is effectively an infinite loop. When the boot sector is loaded in and ran, it will hit this infinite loop and won’t do anything else.
- The
$represents the current address of the code in the assembly code. The$$represents the starting address of the current section. The($-$$)just calculates the difference between the current address of the executing code and the start of the code. So thattimesline just calculate how many bytes left in the 510 bytes of available space in the boot sector that are not set yet, and thedb 0just fills those bytes with 0 bytes. We use 510 because the last 2 bytes are reserved for the magic numbers0xaa55 - The
dw 0xaa55just set the last 2 bytes to the magic numbers
You can compile this and emulate this boot sector using these commands:
nasm -f bin bootsector.asm -o bootsector.bin
qemu-system-x86_64 bootsector.bin
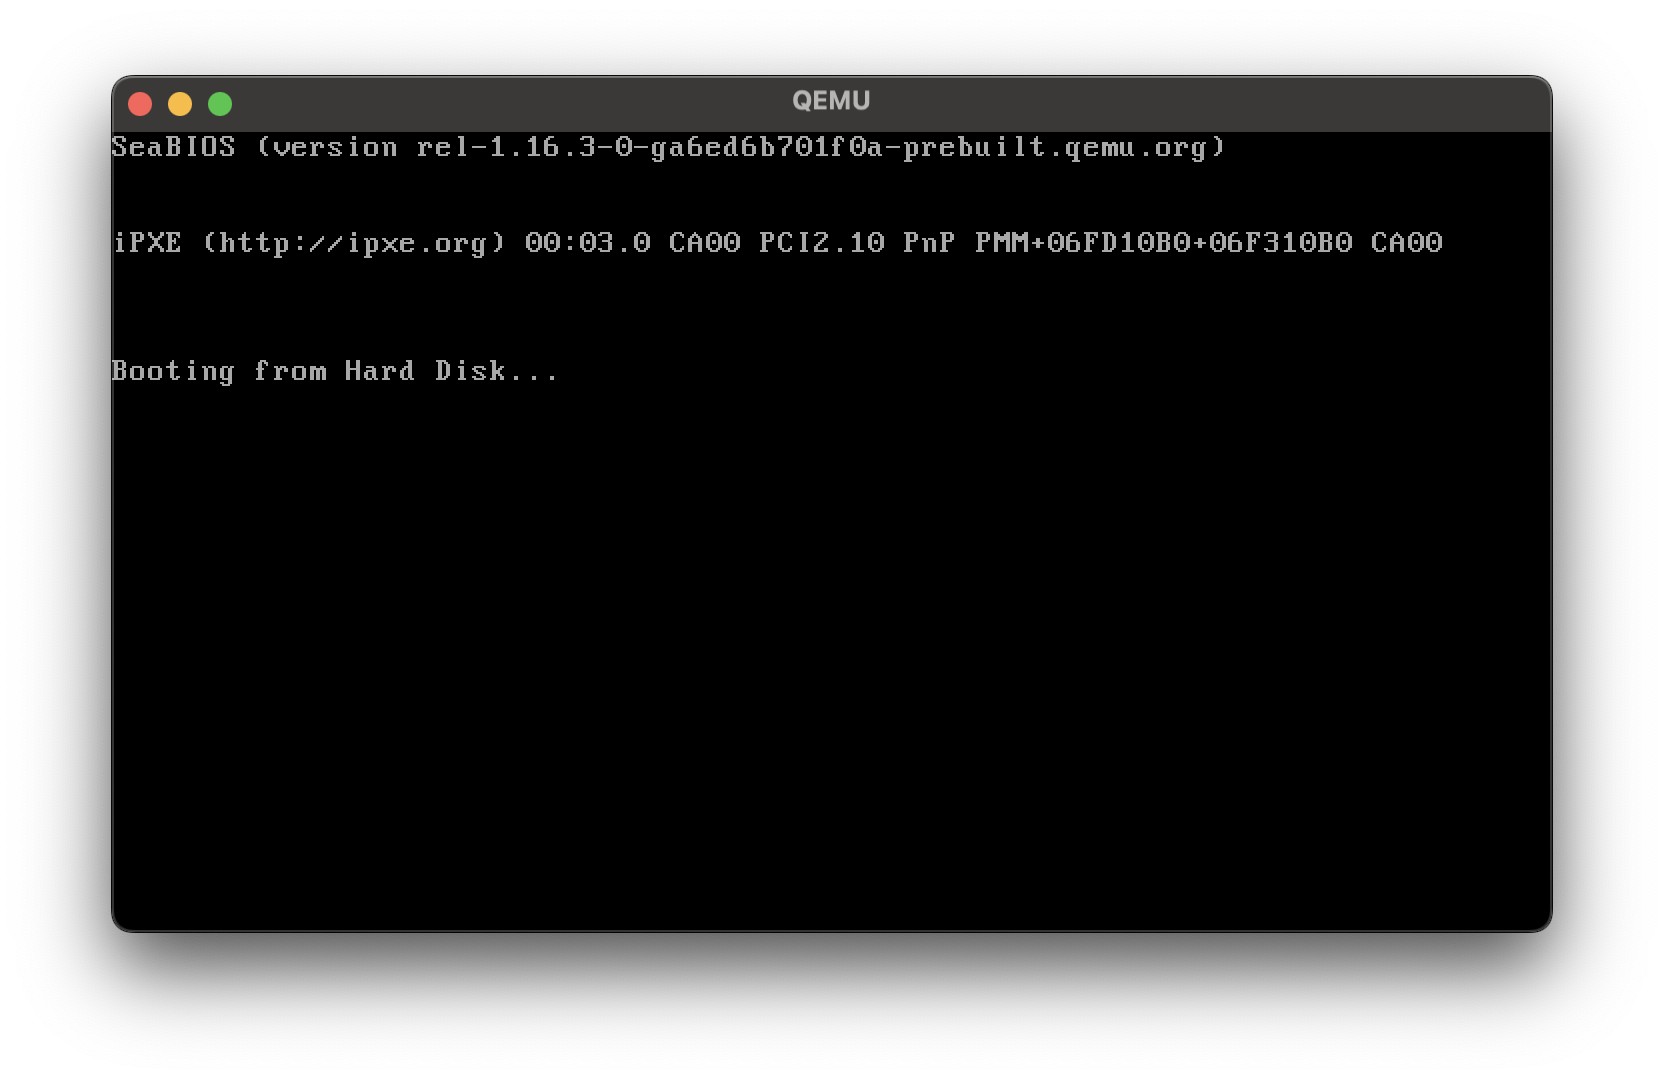
If you see a QEMU window similar to this one, the program should be working. So there we go, we’ve successfully programmed a super simple boot sector.
Printing stuff using the boot sector
Let’s try to print some text onto the screen using the boot sector. For this, we’ll need to use computer registers and interrupts. If you don’t know anything about registers and interrupts, you can read about registers here and about interrupts here.
We’ll need to set the mode to tty mode, this enables text printing in the video service, which allows us to print text to the screen. We can turn on tty mode by setting the ah register with the byte 0x0e.
mov ah, 0x0e
Now that we’ve turned on tty mode, how do we print text to the screen? We can do that through setting the data inside register al and issuing an interrupt. Firstly, we’ll need to set the register al with the letter that we want to print out. Because the register can only hold 1 byte, we can only set 1 letter at a time. Then we can issue an video service interrupt for printing the letter out. We’ll use the 0x10 interrupt to do this:
mov al, 'H'
int 0x10
mov al, 'e'
int 0x10
mov al, 'l'
int 0x10
int 0x10 ; l is still on al
mov al, 'o'
int 0x10
After printing, we can just program an infinite loop like before, so the full program should look like this:
mov ah, 0x0e

mov al, 'H'
int 0x10
mov al, 'e'
int 0x10
mov al, 'l'
int 0x10
int 0x10 ; l is still on al
mov al, 'o'
int 0x10

jmp $

times 510-($-$$) db 0
dw 0xaa55
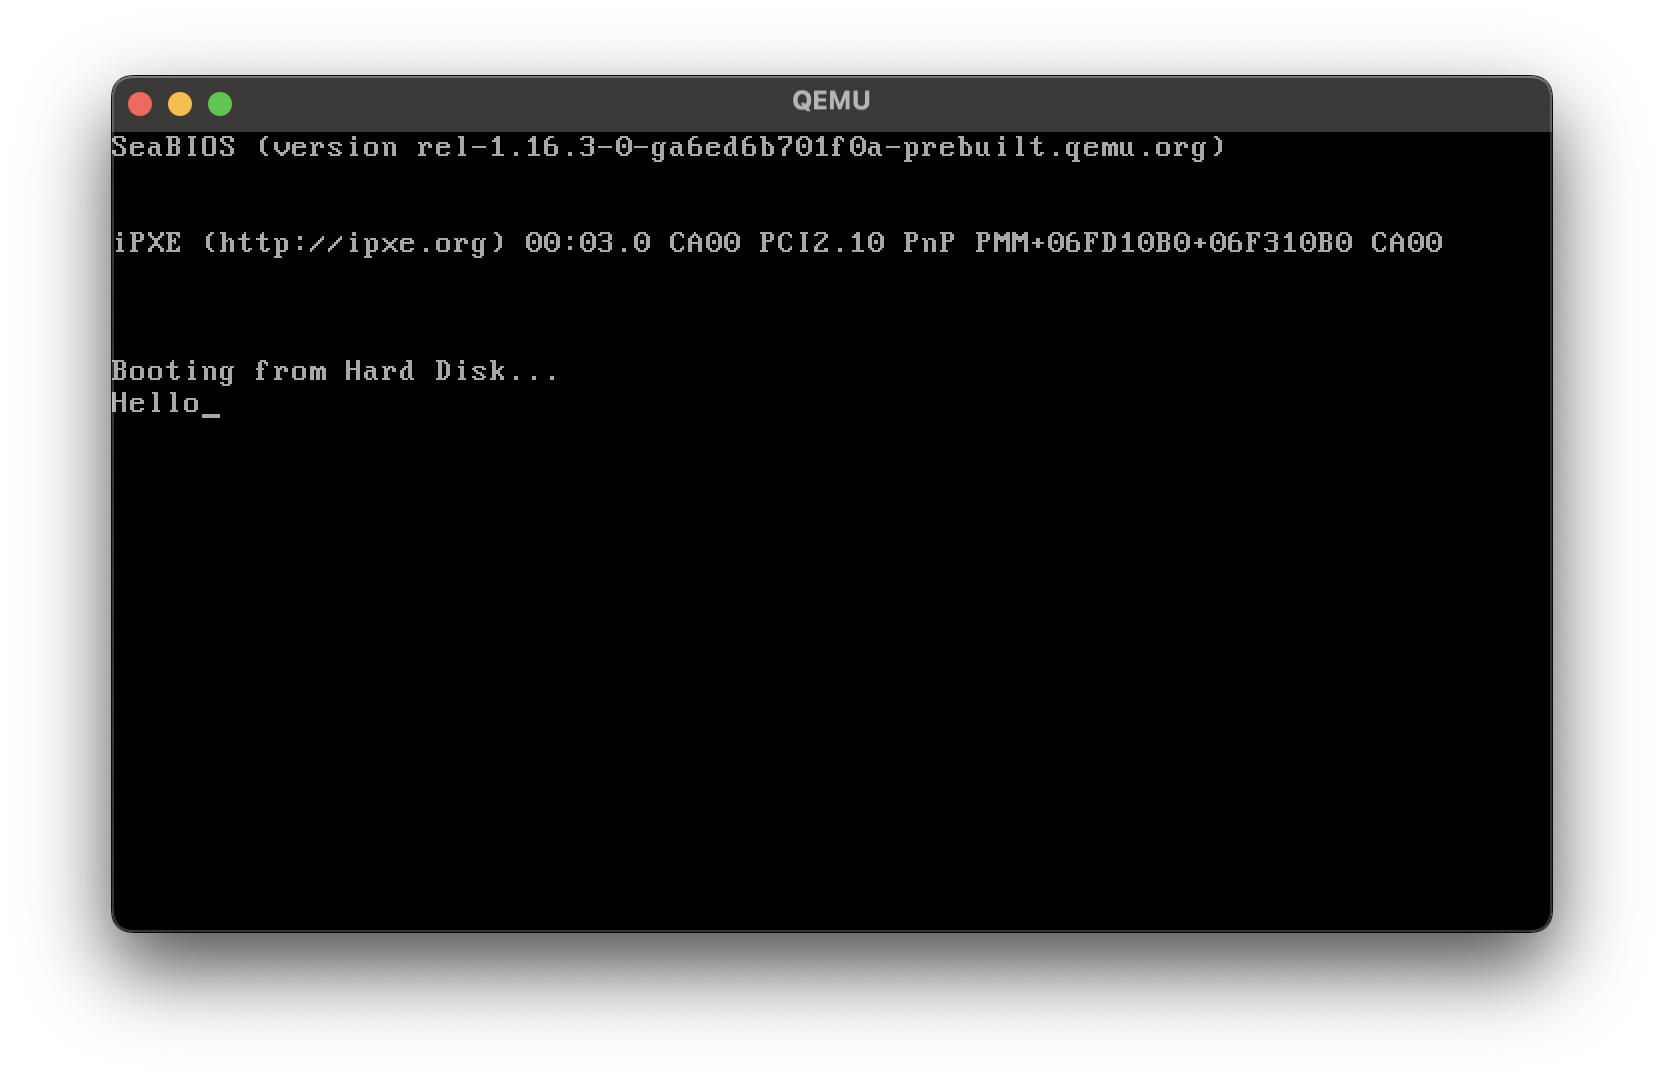
If we compile and emulate this program, we should get this result:
Wrap up
That was the basics of boot sector. We touched on what a boot sector is, how it works, and how to program a simple boot sector from scratch.
In the next post, we’ll develop this boot sector further and explore more boot sector concepts.